前言
Spring Boot Actuator 是 spring-boot 自带监控功能 ,可以帮助实现对程序内部运行情况监控,比如监控状况、Bean 加载情况、环境变量、日志信息、线程信息等。
Spring Boot Admin是一个针对 spring-boot 的 actuator 接口进行 UI 美化封装的监控工具。他可以:
- 在列表中浏览所有被监控 spring-boot 项目的基本信息,
- 详细的Health信息、内存信息、JVM 信息、垃圾回收信息、各种配置信息(比如数据源、缓存列表和命中率)等,
- 还可以直接修改 logger 的 level。
搭建
创建子module spring-cloud-alibaba-2021-admin,pom.xml 内容如下
<?xml version="1.0" encoding="UTF-8"?><project xmlns="http://maven.apache.org/POM/4.0.0"xmlns:xsi="http://www.w3.org/2001/XMLSchema-instance"xsi:schemaLocation="http://maven.apache.org/POM/4.0.0 http://maven.apache.org/xsd/maven-4.0.0.xsd"><parent><artifactId>spring-cloud-alibaba-2021</artifactId><groupId>org.example</groupId><version>1.0-SNAPSHOT</version></parent><modelVersion>4.0.0</modelVersion><artifactId>spring-cloud-alibaba-2021-admin</artifactId><packaging>pom</packaging><modules><module>admin-client</module><module>admin-server</module></modules><properties><admin.version>2.5.3</admin.version></properties><dependencyManagement><dependencies><!-- SpringBoot Admin 服务端 --><dependency><groupId>de.codecentric</groupId><artifactId>spring-boot-admin-starter-server</artifactId><version>${admin.version}</version></dependency><!-- SpringBoot Admin 客户端 --><dependency><groupId>de.codecentric</groupId><artifactId>spring-boot-admin-starter-client</artifactId><version>${admin.version}</version></dependency></dependencies></dependencyManagement><dependencies><!-- web支持 --><dependency><groupId>org.springframework.boot</groupId><artifactId>spring-boot-starter-web</artifactId></dependency></dependencies></project>
创建二级子module
创建 监控中心服务端server
在 spring-cloud-alibaba-2021-admin 工程下在创建子module admin-server, pom.xml 内容如下
<?xml version="1.0" encoding="UTF-8"?><project xmlns="http://maven.apache.org/POM/4.0.0"xmlns:xsi="http://www.w3.org/2001/XMLSchema-instance"xsi:schemaLocation="http://maven.apache.org/POM/4.0.0 http://maven.apache.org/xsd/maven-4.0.0.xsd"><parent><artifactId>spring-cloud-alibaba-2021-admin</artifactId><groupId>org.example</groupId><version>1.0-SNAPSHOT</version></parent><modelVersion>4.0.0</modelVersion><artifactId>admin-server</artifactId><dependencies><!-- SpringBoot Admin 服务端依赖 --><dependency><groupId>de.codecentric</groupId><artifactId>spring-boot-admin-starter-server</artifactId></dependency><!-- spring security --><dependency><groupId>org.springframework.boot</groupId><artifactId>spring-boot-starter-security</artifactId></dependency><!-- nacos 服务注册发现(客户端)依赖 --><dependency><groupId>com.alibaba.cloud</groupId><artifactId>spring-cloud-starter-alibaba-nacos-discovery</artifactId></dependency><!-- nacos-config 配置中心依赖 --><dependency><groupId>com.alibaba.cloud</groupId><artifactId>spring-cloud-starter-alibaba-nacos-config</artifactId></dependency><!--spring-cloud-dependencies 2020.0.0 版本不在默认加载bootstrap.yml 文件,如果需要加载bootstrap 文件需要手动添加依赖--><dependency><groupId>org.springframework.cloud</groupId><artifactId>spring-cloud-starter-bootstrap</artifactId></dependency></dependencies></project>
application.yml 配置文件如下
server:port: 7001spring:# 后面的bean会覆盖前面相同名称的beanmain:allow-bean-definition-overriding: true# 安全认证security:user:# 账号name: admin# 密码password: 123456boot:admin:ui:# 网页标题title: spring-cloud-alibaba-2021微服务监控
bootstrap.yml配置文件内容如下
spring:application:name: admin-server-demoprofiles:active: yexindong_activenacos-server-addr: http://chn520.cn:8848cloud:nacos:discovery:server-addr: ${spring.profiles.nacos-server-addr} # 服务注册中心地址namespace: public # 注册到nacos的名称空间,默认为publicconfig:# namespace: public # 如果是默认的public,则不需要指定名称空间,否则控制台会一直打印日志file-extension: yaml # 指定yaml格式的配置, 必须要放到bootstrao.yml 才会生效,放到application下不会生效server-addr: ${spring.profiles.nacos-server-addr} #配置中心地址group: DEFAULT_GROUP# 指定配置文件,可指定多个shared-configs[0]:data-id: spring-cloud-alibaba-config.yamlrefresh: true # 是否自动刷新
监控中心服务端配置类WebSecurityConfig.java
package com.alibaba.cloud.config;import de.codecentric.boot.admin.server.config.AdminServerProperties;import org.springframework.context.annotation.Configuration;import org.springframework.security.config.annotation.web.builders.HttpSecurity;import org.springframework.security.config.annotation.web.configuration.WebSecurityConfigurerAdapter;import org.springframework.security.web.authentication.SavedRequestAwareAuthenticationSuccessHandler;/*** 监控权限配置**/@Configurationpublic class WebSecurityConfig extends WebSecurityConfigurerAdapter {/*** 上下文路径*/private final String contextPath;/*** 构造函数* @param adminServerProperties*/public WebSecurityConfig(AdminServerProperties adminServerProperties) {this.contextPath = adminServerProperties.getContextPath();}@Overrideprotected void configure(HttpSecurity http) throws Exception {SavedRequestAwareAuthenticationSuccessHandler successHandler = new SavedRequestAwareAuthenticationSuccessHandler();successHandler.setTargetUrlParameter("redirectTo");successHandler.setDefaultTargetUrl(contextPath + "/");http.headers().frameOptions().disable().and().authorizeRequests().antMatchers(contextPath + "/assets/**", contextPath + "/login", contextPath + "/actuator/**", contextPath + "/instances/**").permitAll().anyRequest().authenticated().and().formLogin().loginPage(contextPath + "/login").successHandler(successHandler).and().logout().logoutUrl(contextPath + "/logout").and().httpBasic().and().csrf().disable();}}
启动类 AdminServerApp.java
package com.alibaba.cloud;import de.codecentric.boot.admin.server.config.EnableAdminServer;import org.springframework.boot.SpringApplication;import org.springframework.boot.autoconfigure.SpringBootApplication;@SpringBootApplication@EnableAdminServerpublic class AdminServerApp {/*** 启动后访问地址: http://localhost:7001 即可查看监控信息* @param args*/public static void main(String[] args) {SpringApplication.run(AdminServerApp.class, args);}}
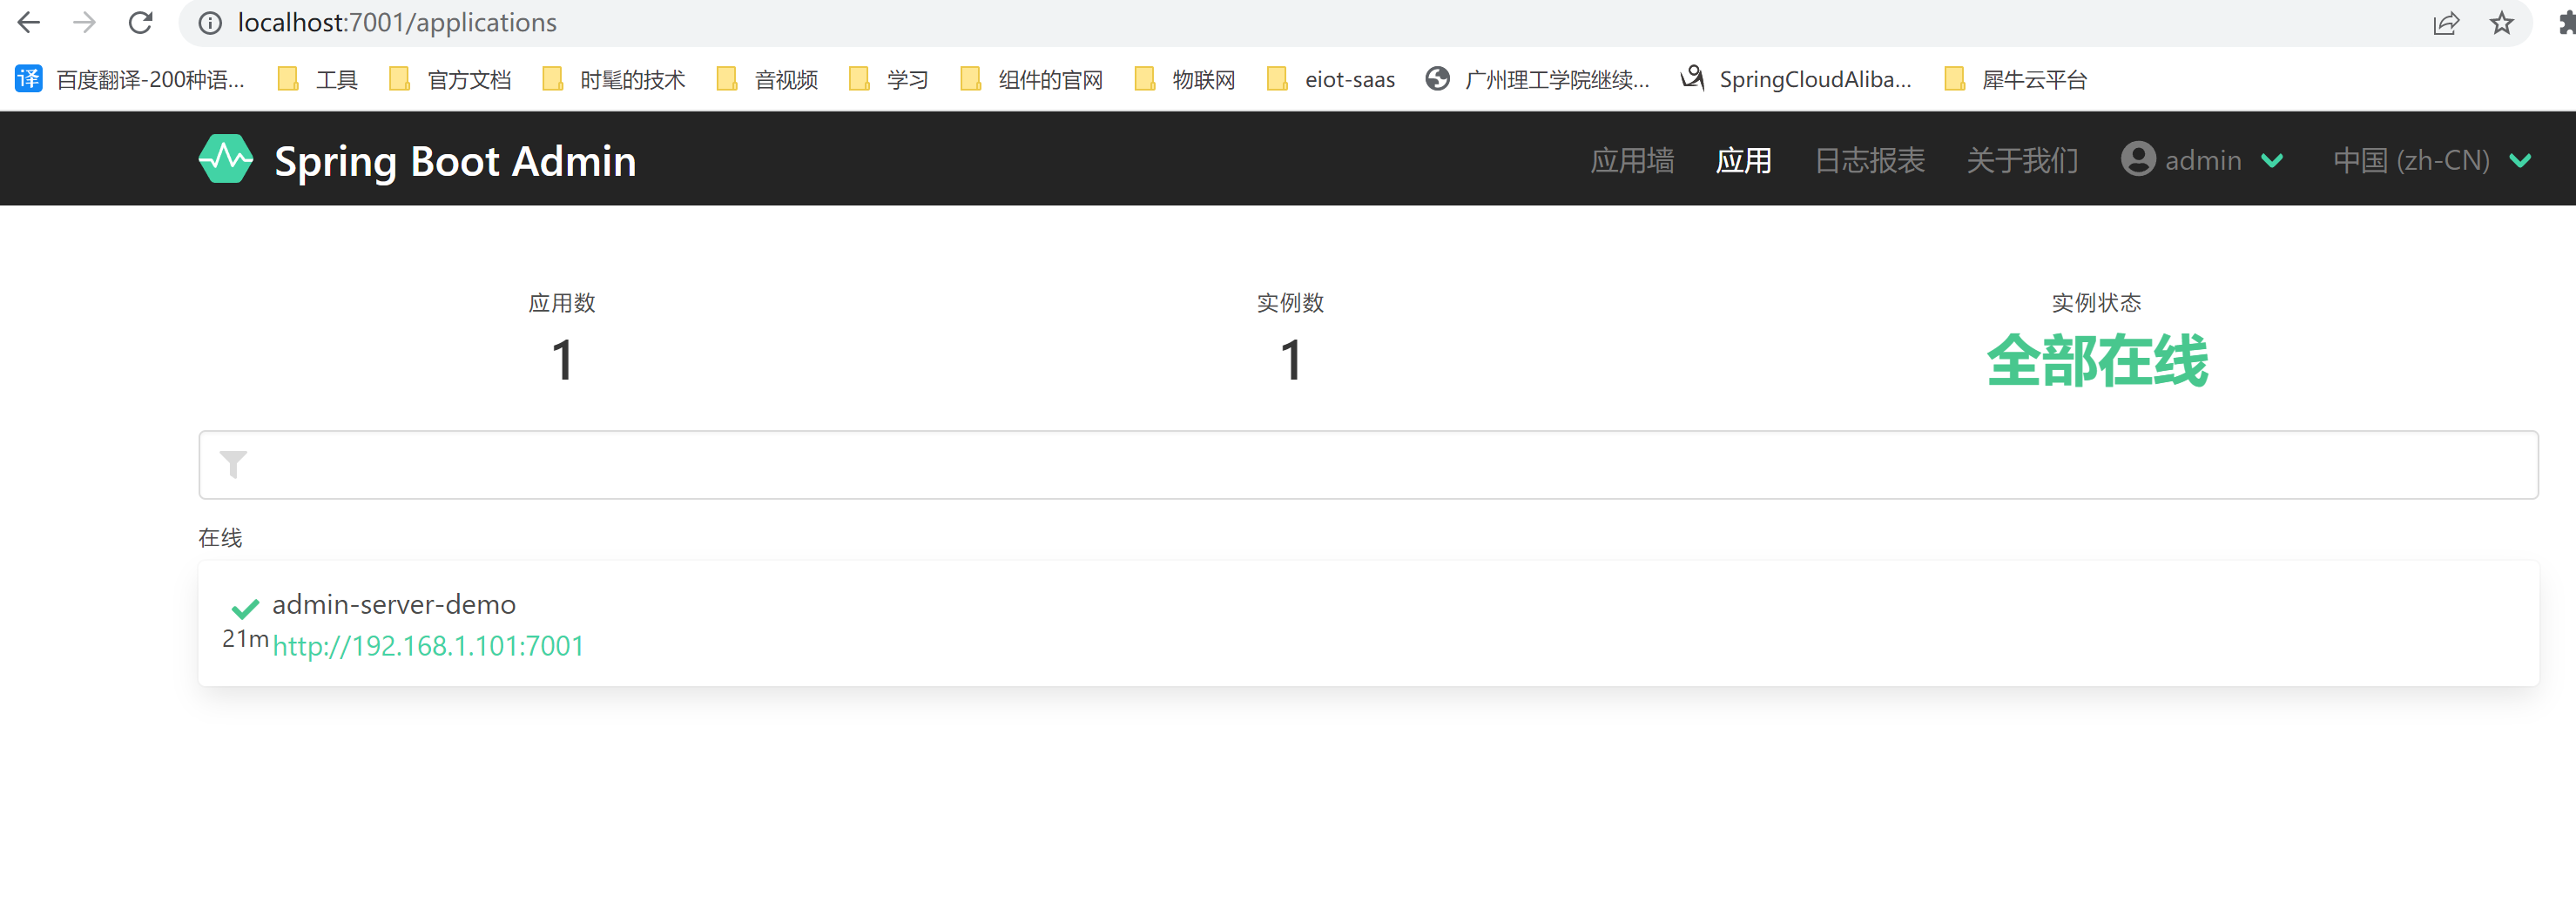
启动main方法,在浏览器输入http://localhost:7001, 因为已经将当前服务注册到了nacos,而admin监控中心会自动去nacos取所有的服务地址,所以可以看到监控中心有自己的服务;
创建监控中心客户端 client
在 spring-cloud-alibaba-2021-admin 工程下在创建子module admin-client, pom.xml 内容如下
<?xml version="1.0" encoding="UTF-8"?><project xmlns="http://maven.apache.org/POM/4.0.0"xmlns:xsi="http://www.w3.org/2001/XMLSchema-instance"xsi:schemaLocation="http://maven.apache.org/POM/4.0.0 http://maven.apache.org/xsd/maven-4.0.0.xsd"><parent><artifactId>spring-cloud-alibaba-2021-admin</artifactId><groupId>org.example</groupId><version>1.0-SNAPSHOT</version></parent><modelVersion>4.0.0</modelVersion><artifactId>admin-client</artifactId><dependencies><!-- SpringBoot Admin 客户端 --><dependency><groupId>de.codecentric</groupId><artifactId>spring-boot-admin-starter-client</artifactId></dependency><!-- SpringBoot Actuator 依赖,admin就是对Actuator封装了一层,增加了一些功能 --><dependency><groupId>org.springframework.boot</groupId><artifactId>spring-boot-starter-actuator</artifactId></dependency><!-- nacos 服务注册发现(客户端)依赖 --><dependency><groupId>com.alibaba.cloud</groupId><artifactId>spring-cloud-starter-alibaba-nacos-discovery</artifactId></dependency><!-- nacos-config 配置中心依赖 --><dependency><groupId>com.alibaba.cloud</groupId><artifactId>spring-cloud-starter-alibaba-nacos-config</artifactId></dependency><!--spring-cloud-dependencies 2020.0.0 版本不在默认加载bootstrap.yml 文件,如果需要加载bootstrap 文件需要手动添加依赖--><dependency><groupId>org.springframework.cloud</groupId><artifactId>spring-cloud-starter-bootstrap</artifactId></dependency></dependencies></project>
application.yml内容如下
server:port: 9001spring:boot:# admin: # 若已将服务注册到nacos,则这里不需要指定,监控中心会自动去nacos取服务列表# client:# # 监控中心地址# url:# - http://localhost:7001# 暴露我们的所有监控信息management:endpoints:web:exposure:include: '*'
bootstrap.yml 内容如下
spring:application:name: admin-client-demo # 取pom文件中 artifactId 标签的值profiles:active: yexindong_activenacos-server-addr: http://chn520.cn:8848cloud:nacos:discovery:server-addr: ${spring.profiles.nacos-server-addr} # 服务注册中心地址namespace: public # 注册到nacos的名称空间,默认为publicconfig:# namespace: public # 如果是默认的public,则不需要指定名称空间,否则控制台会一直打印日志file-extension: yaml # 指定yaml格式的配置, 必须要放到bootstrao.yml 才会生效,放到application下不会生效server-addr: ${spring.profiles.nacos-server-addr} #配置中心地址group: DEFAULT_GROUP# 指定配置文件,可指定多个shared-configs[0]:data-id: spring-cloud-alibaba-config.yamlrefresh: true # 是否自动刷新
启动类 AdminClientApp.java
package com.libaba.cloud;import org.springframework.boot.SpringApplication;import org.springframework.boot.autoconfigure.SpringBootApplication;@SpringBootApplicationpublic class AdminClientApp {public static void main(String[] args) {SpringApplication.run(AdminClientApp.class, args);}}
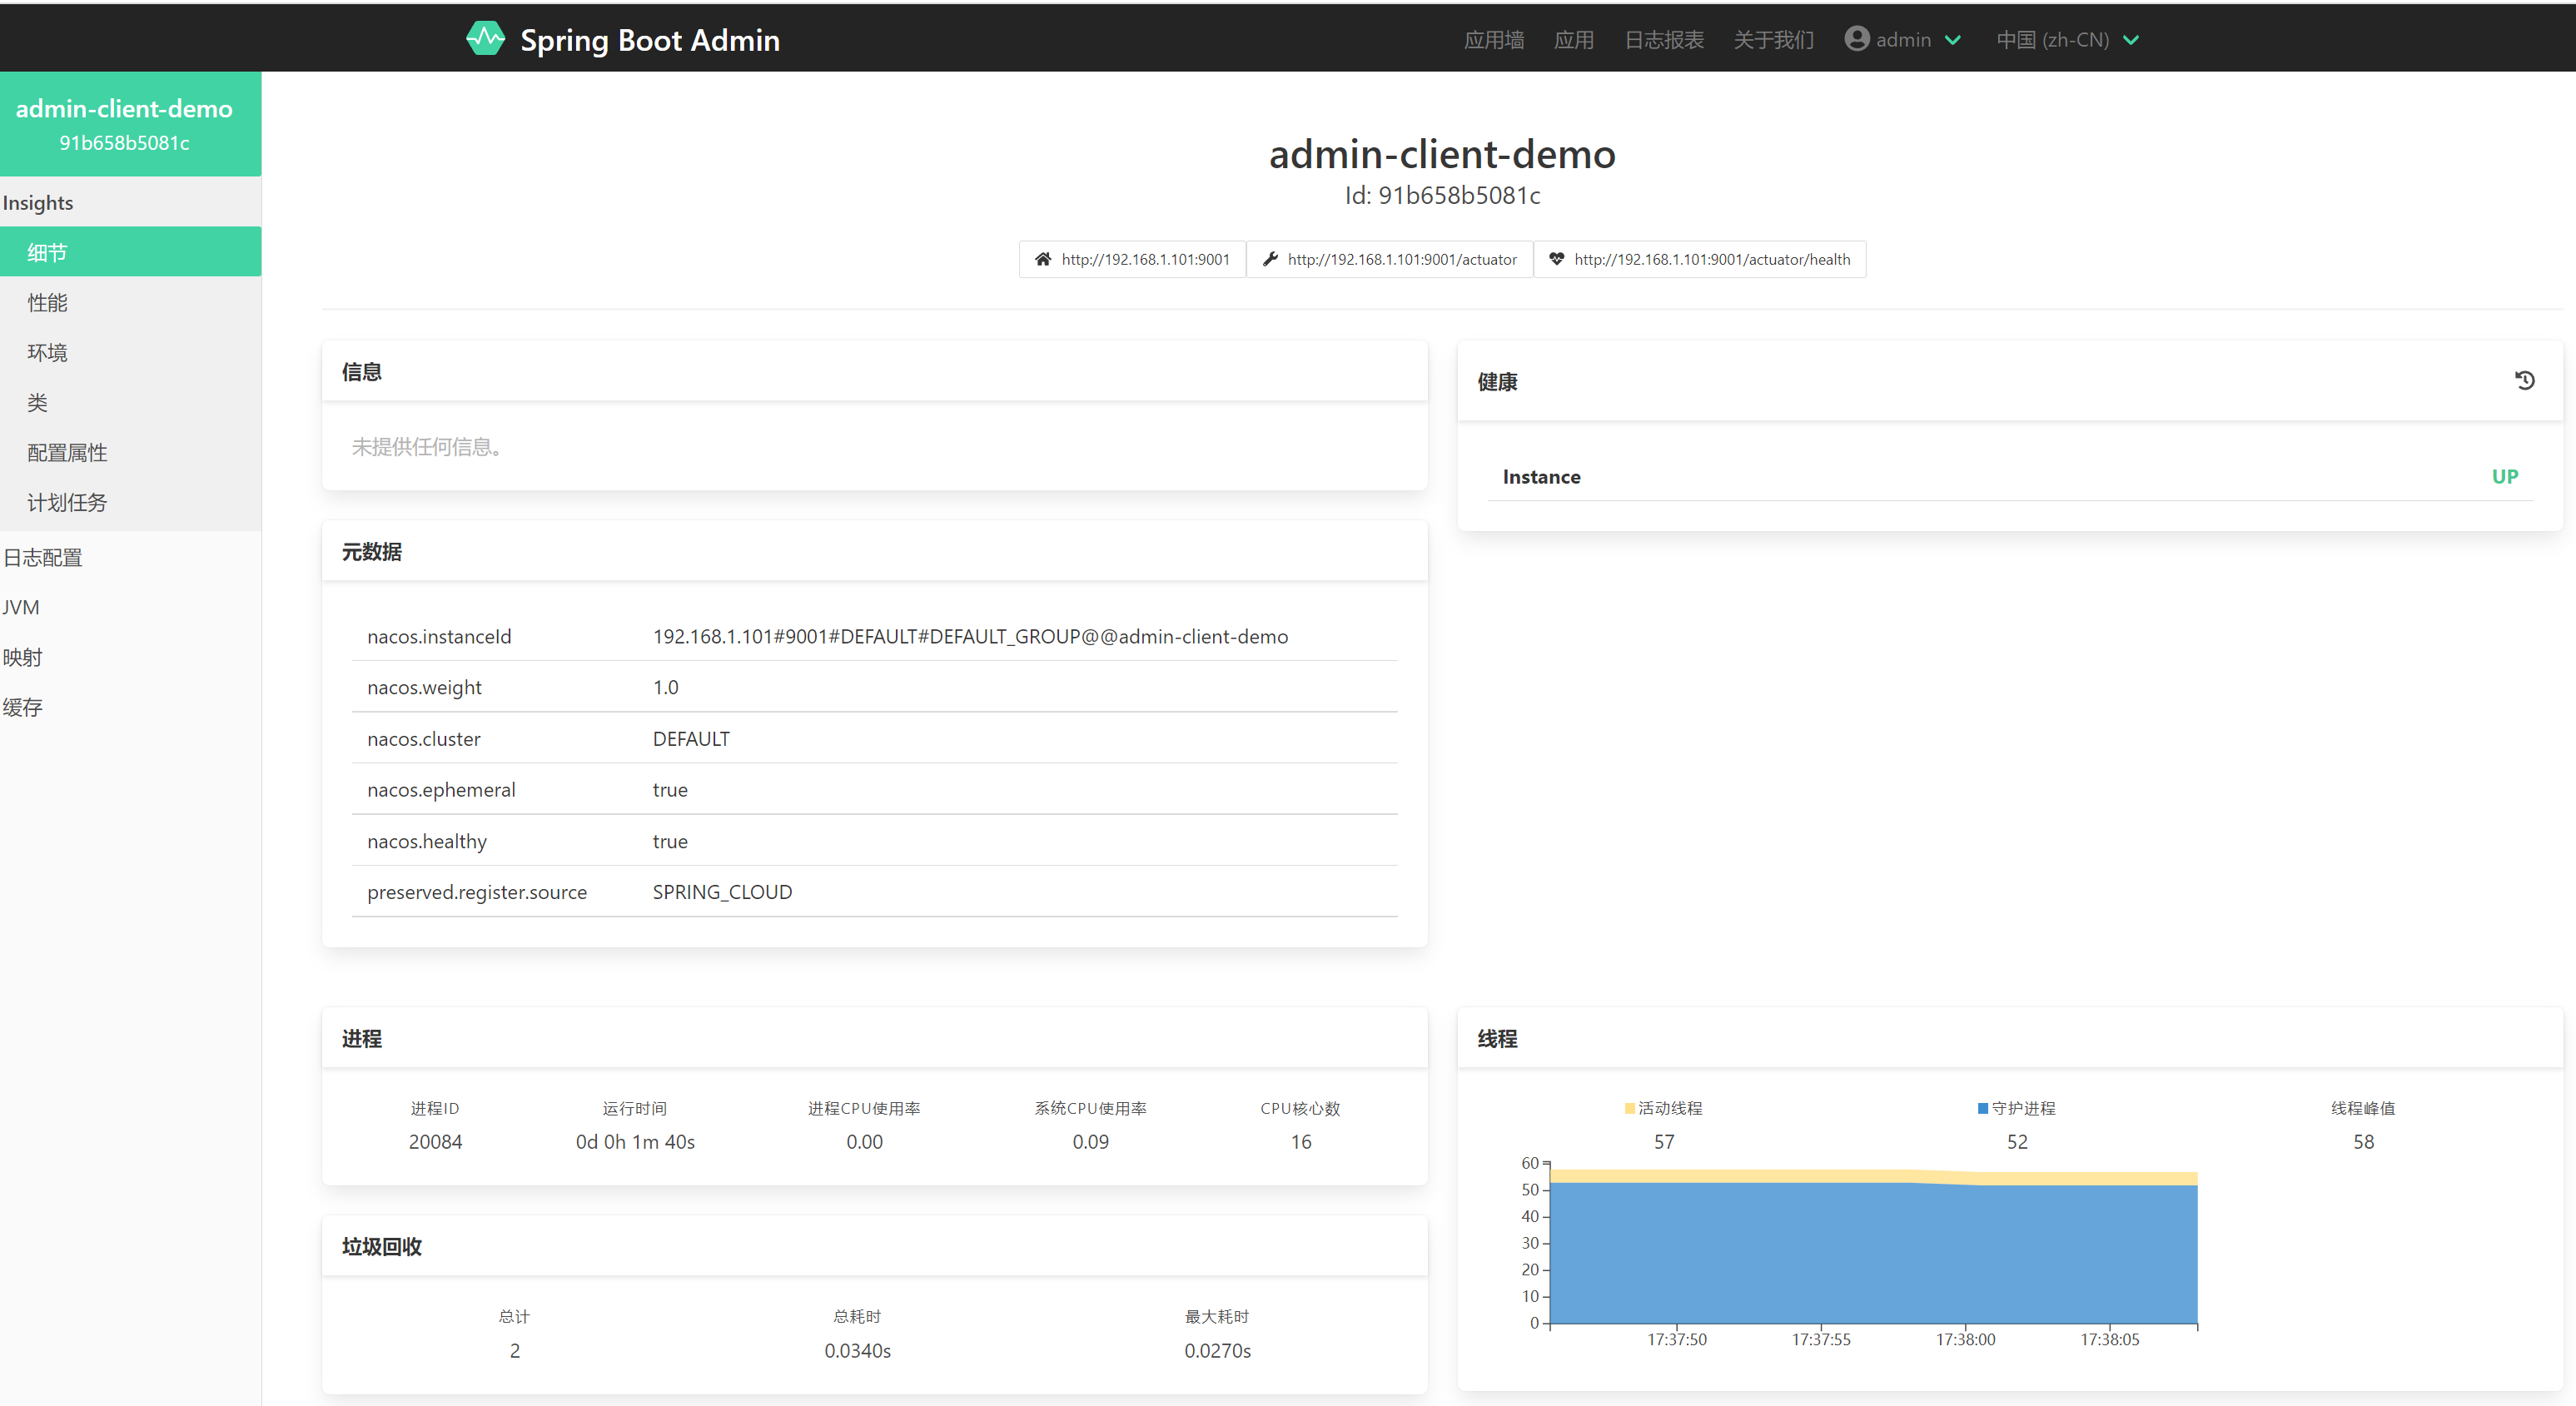
启动 main 方法,然后再次访问 http://localhost:7001 ,监控中心显示如下,可以看到,已经对客户端进行监控了

接着我们点进去,就可以看到该服务的所有监控信息
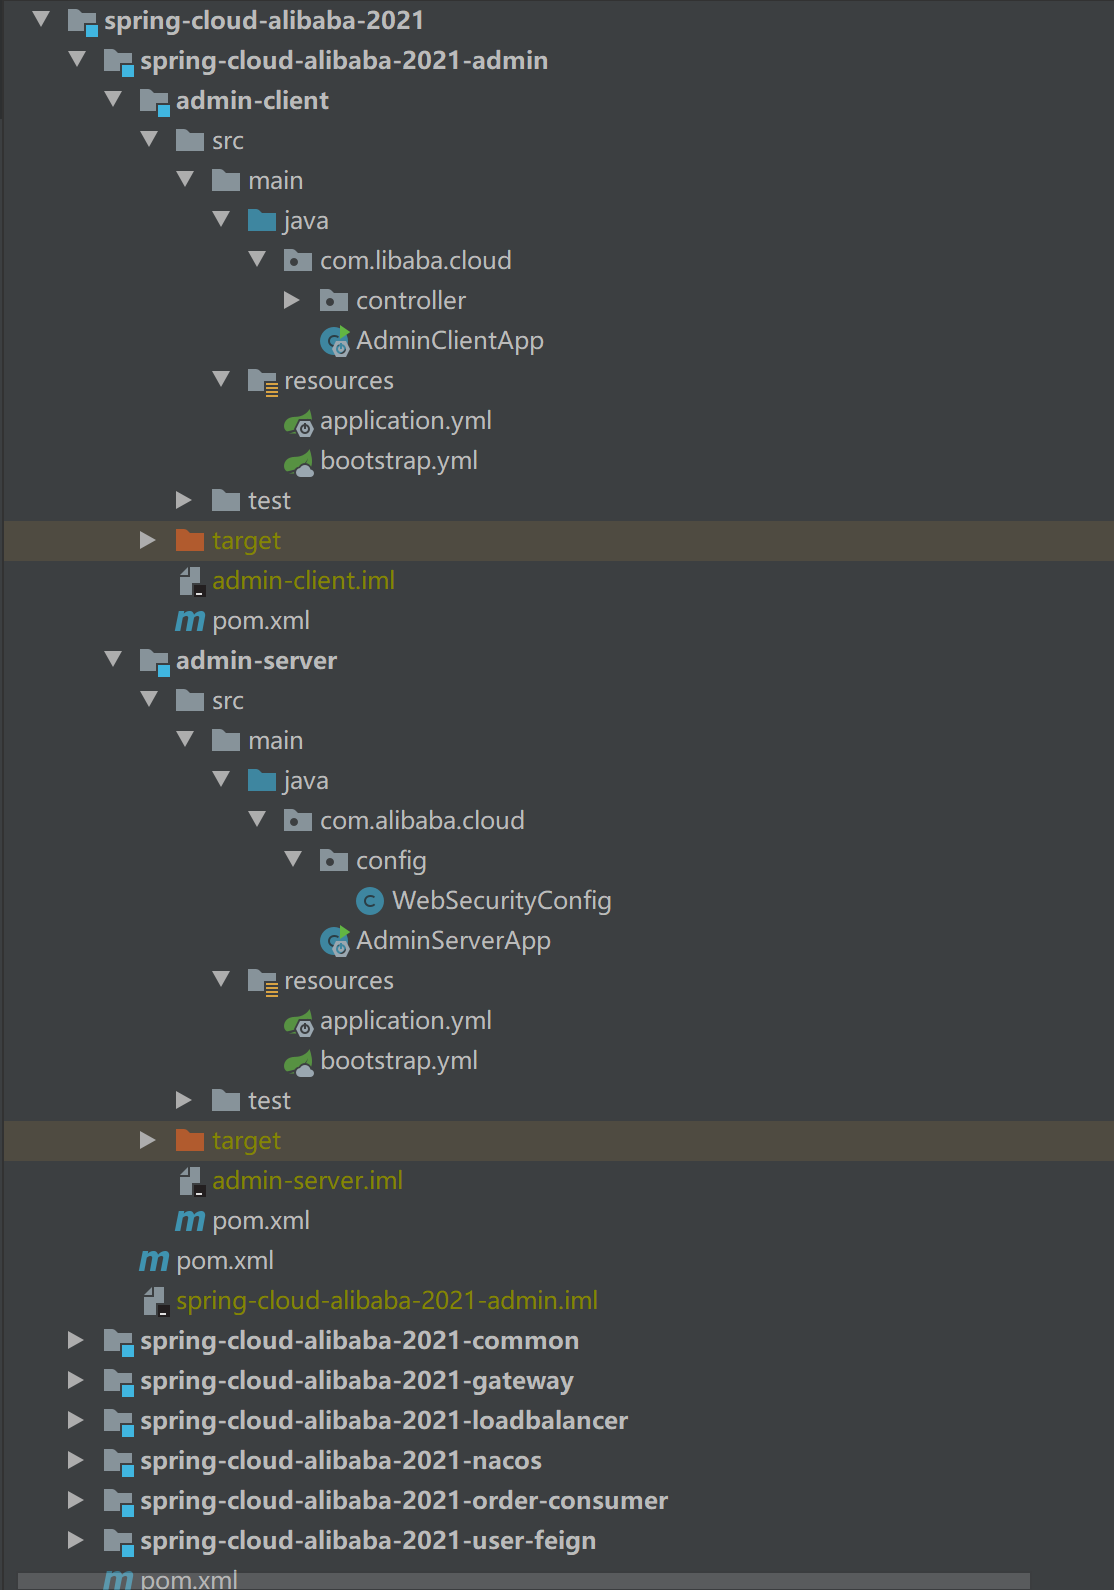
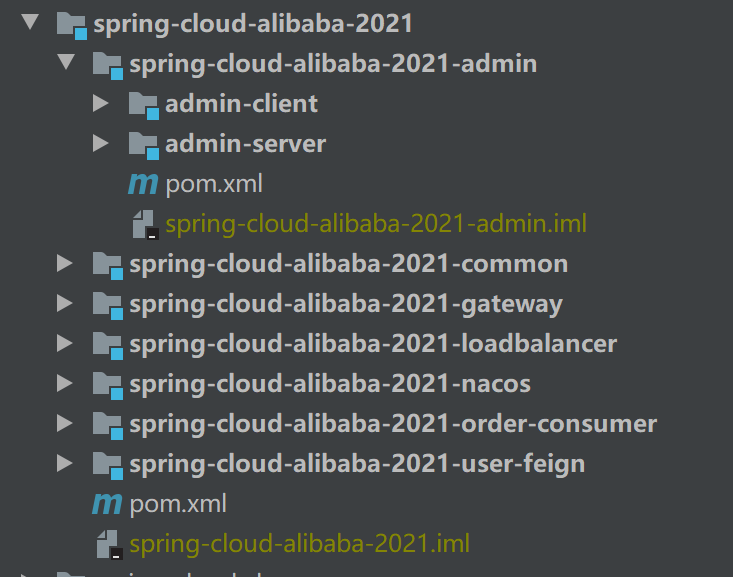
项目结构图
整体项目结构如下
在来张展开后的结构图